Revised for Version 24.5
Reports created with BPTrakr Pro Edition
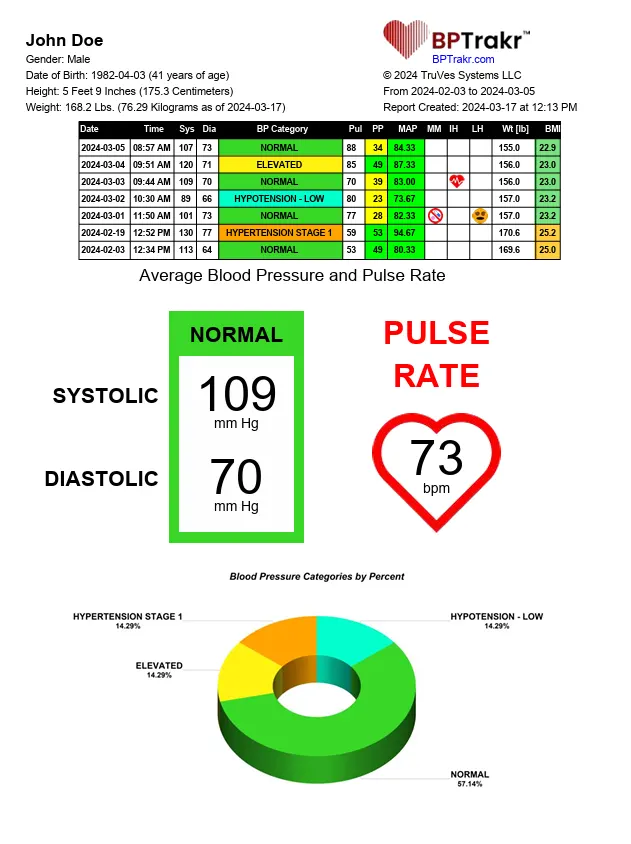
BPTrakr Pro Edition creates customized comprehensive reports in PDF format, with a data table, category reference charts, graphs, and statistics. Reports can be either emailed or printed and presented to a medical professional such as your family physician.
Reports created with BPTrakr Free Edition
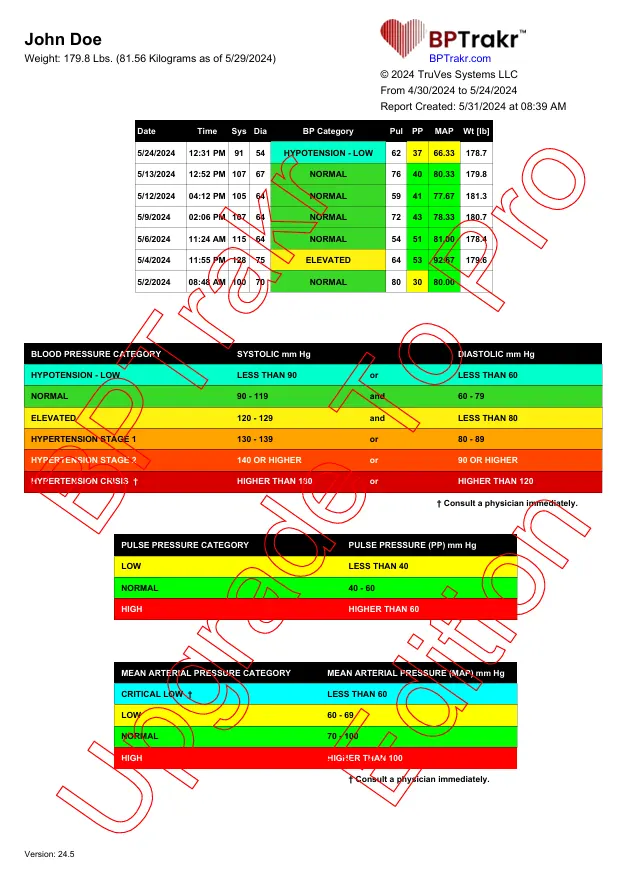
Please note that the BPTrakr Free Edition creates reports with a digital watermark with the words “BPTrakr – Upgrade To Pro Edition”, which is embedded into the PDF document. Reports created with the BPTrakr Pro Edition do not contain this watermark. Learn about the BPTrakr Pro Edition and it’s pricing.
Also note that the content of a report created with the BPTrakr Free Edition is limited to a data table and category reference charts only.
Create the Blood Pressure Report
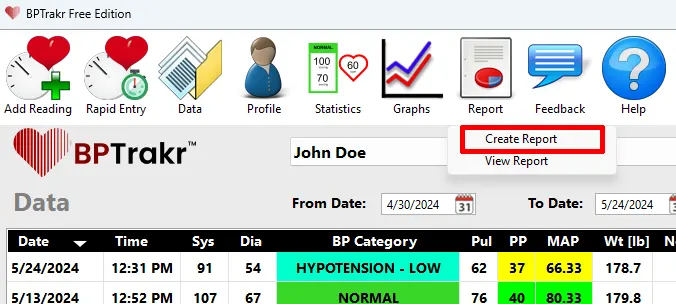
Step 1: On the toolbar, click on the Report button and select Create Report from the dropdown list. The Create Report window will appear.
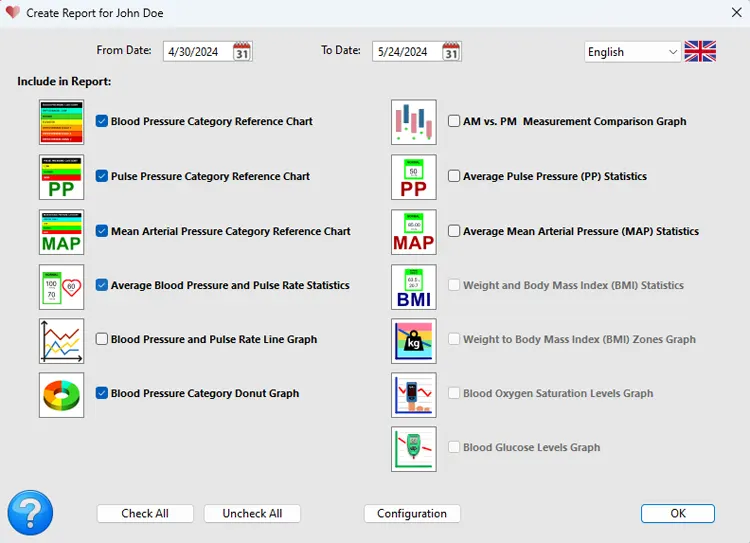
Step 2: On the Create Report window, select the desired date range. Then select the language of the report. Also select or deselect the desired category reference charts, statistics and graphs to be included in the report. Click the OK button.
Note: The default Report Output Folder is your computer’s Desktop folder. To select a different folder or make a new folder for all newly created Blood Pressure Reports see help document: How to Change the Report Output Folder.
A PDF file of your report is created and displayed in your computer’s default PDF reader.
To view a report previously created see: How to View a Blood Pressure Report.
See also
- How to Change the Report Output Folder
- Language Options for the Blood Pressure Report
- How to Hide the Blood Pressure Category Column on the Data Table in a Blood Pressure Report
Comments / Questions